Hi everyone,
This weekend we installed new vane gear and a canvas 'raincatcher'. We also did a host of smaller jobs.
WindPilot Pacific Vane Gear
Zen Again used to have an Aires vane gear but it was in a sorry state on arrival in the UK. We had refitted it in Canberra where we had a home workshop. It served us well all the way to the UK but we sold it since another refit just wasn't practical for us.
This week our new
WindPilot Pacific vane gear arrived from Germany. It's a really well designed and engineered system. The documentation is good too.
 |
| Just like Christmas! |
On Friday evening we unpacked and assembled the system, less the mounting bracket. The trial fitting proved we didn't need a mount extension. A range of extensions are available to suit different transom configurations. It also allowed us to decide the mounting height.
 |
| Mount suspended in place for trial fit |
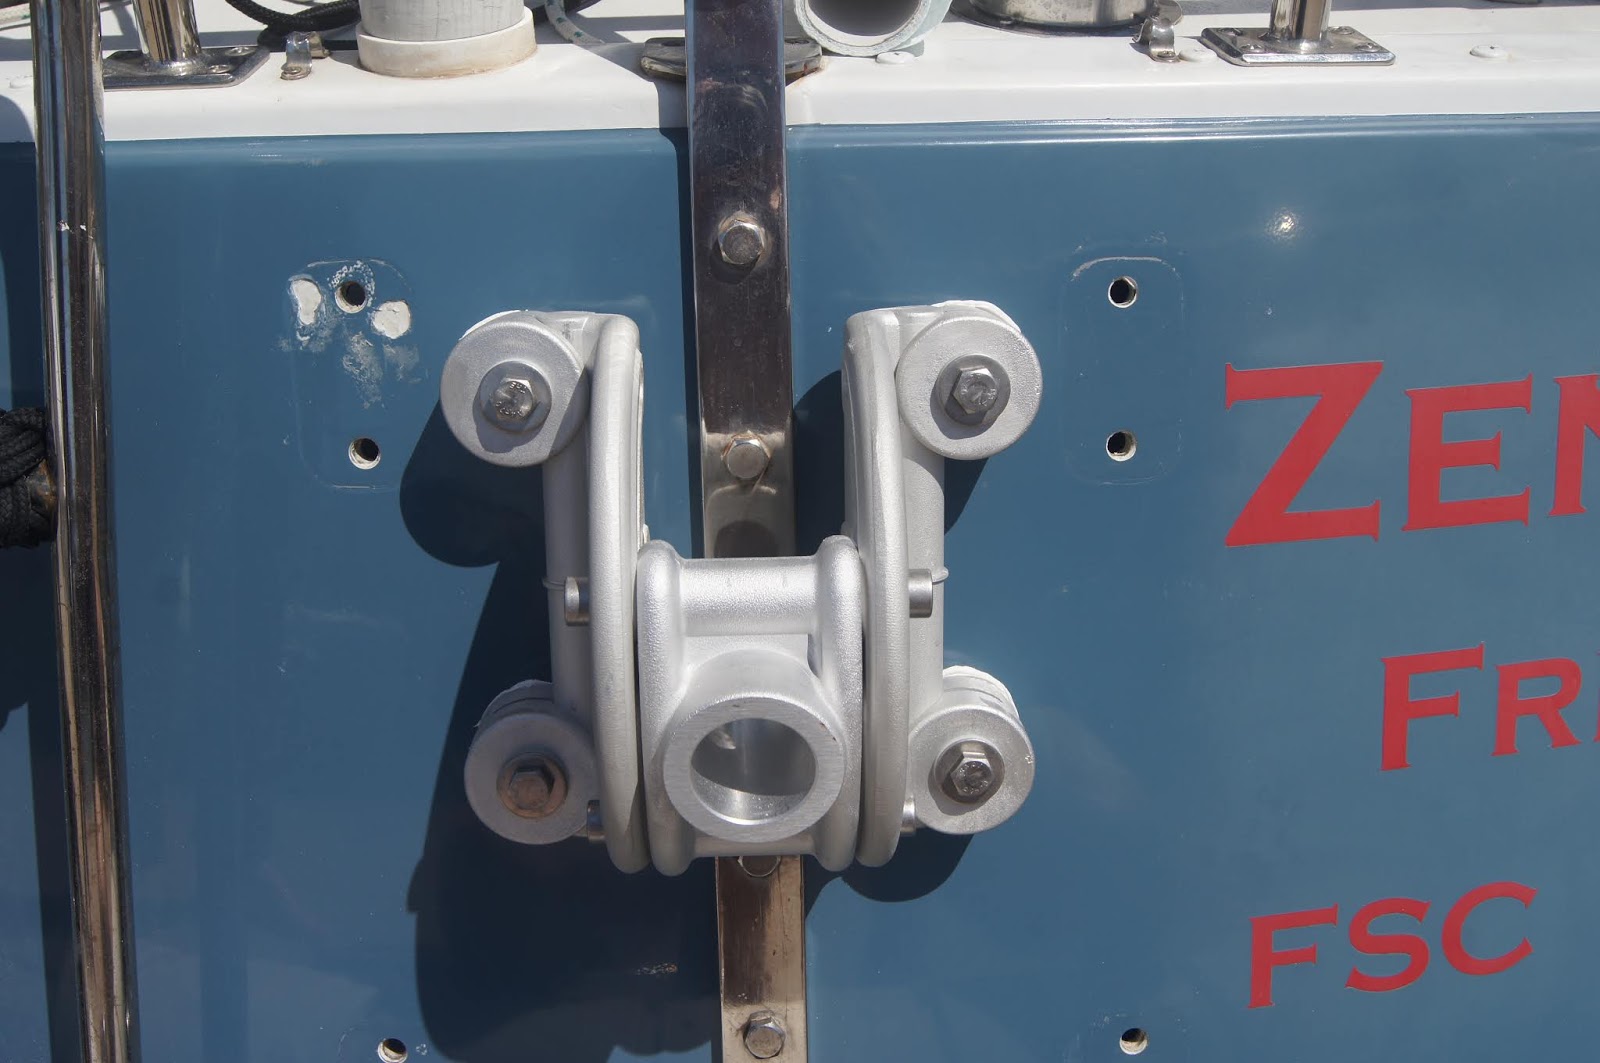
On Saturday we fitted the system. Most of the time was spent cutting, shaping and fitting wooden backing plates for the four mounting bolts. They were only necessary due to the backstay chain plate's backing plate which was close to the new bolt holes. With the backing plates in place we could fit the mounting bracket.
 |
| Mounting bracket in place |
 |
| Backing plates in the lazarette |
 |
| Small, neat mounting bracket |
The next step was to fit the system to the mount. It simply slots in and is locked in place with two bolts.
 |
| Ready to mount |
 |
| System in place |
We could then attach the water vane and check its height above the static waterline. Twould have been a shame if it wasn't! Then we could swing the water vane up into its stowed position, checking it cleared the boarding ladder.
 |
| Water vane stowed |
Next we ran the tiller lines. This required fitting two new blocks and re-using two from the Aires installation. Sadly the vane gear pin integral to our s/s tiller is too large for the s/s chain supplied with the WindPilot so we'll have to source an alternative.
 |
| Tiller lines run via two blocks each side |
The vane gear's apparent wind direction is controlled using a light 'endless' line. It's attached to the tiller via a shock cord loop for easy access.
 |
| Adjustment line |
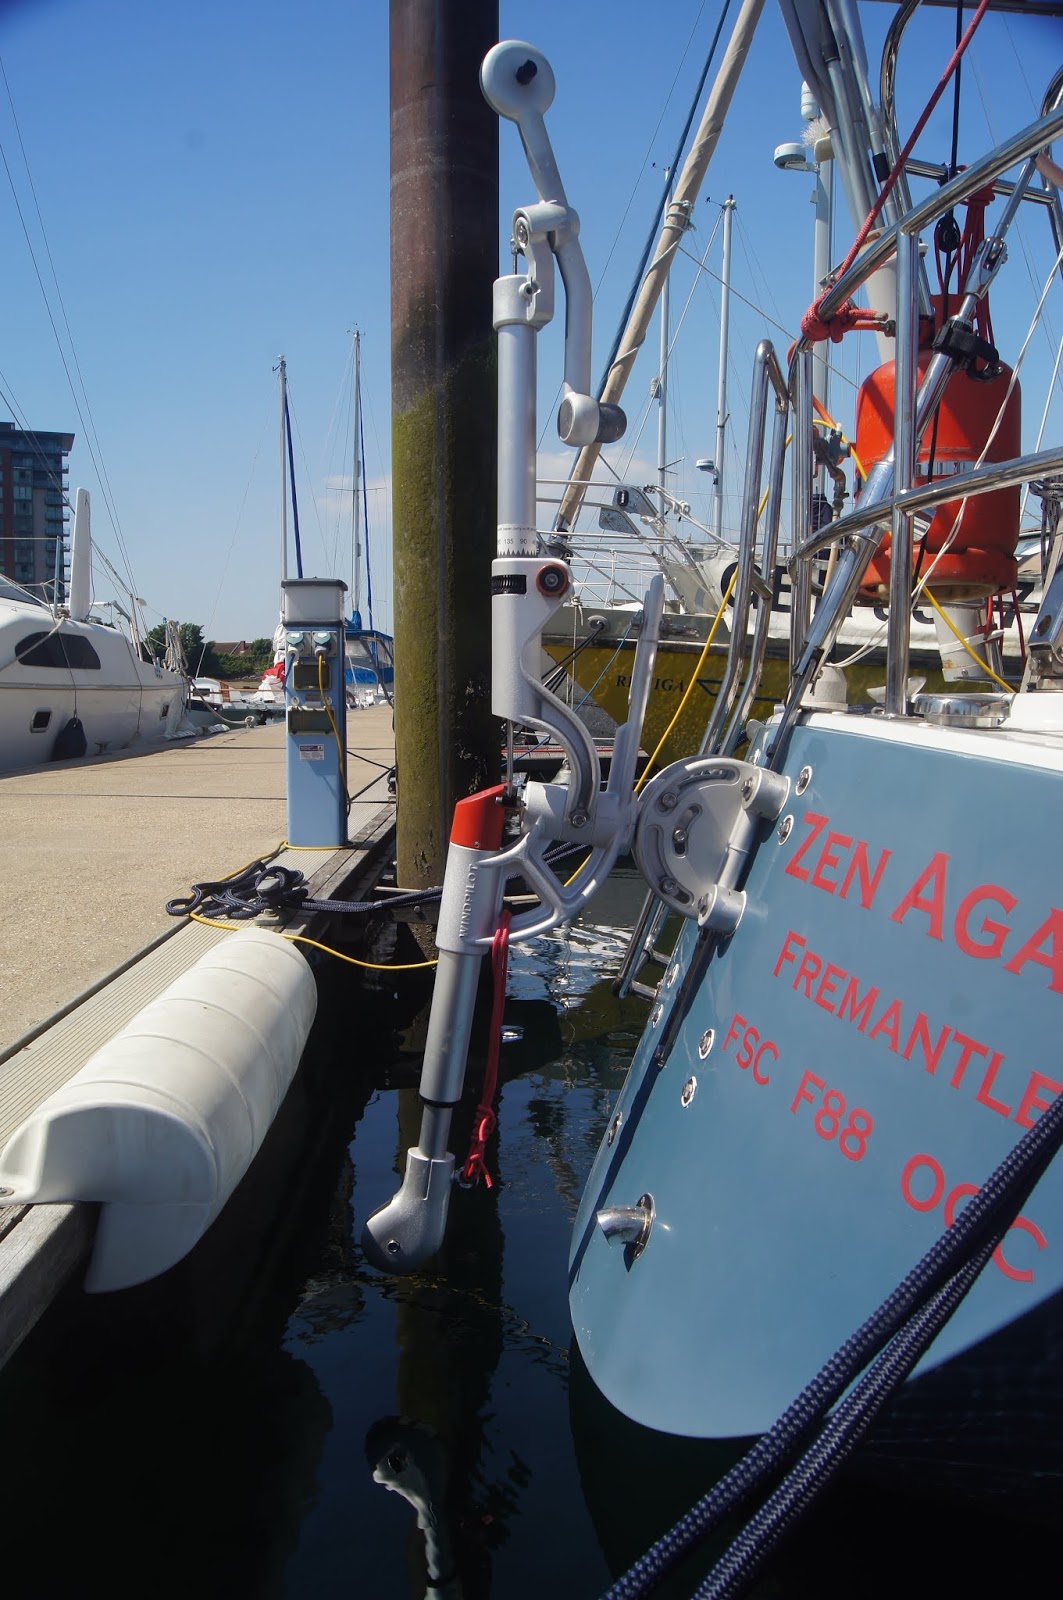
The final step was to fit the air vane. This showed a problem which we'd expected - the vane is too tall to clear the goal post. Apparently this is common and the solution is to rake the vane as shown below.
 |
| Air vane fitted at a rakish angle |
Below is a closer view of the mechanism. Under the red cover is the bevel gear. When the air vane tilts (due to the boat going off-course) a push rod moves up/down. The bevel gear transforms this linear action into rotation of the water vane. The water vane then moves to port/starboard and the arm on the other side of the pivot point pulls a tiller line. Hopefully that puts the boat back on course!
 |
| WindPilot |
Canvas RainCatcher
One of the things we have found difficult at sea is catching rain water. We could do so using our boom tent at anchor but not while sailing. We came up with an idea to have a canvas panel under our solar panels to collect rain water.
Adrift Covers in Gosport constructe the raincatcher for us.
 |
| Unpacked |
We fitted the raincatcher on Sunday. It took a while, mainly because there's so little room between the solar panels and the s/s surround. The raincatcher laces-up nice and tight.
 |
| All laced up |
The backstay feeds through a reinforced slit in the canvas. So we had to disconnect the backstay to feed it through. The HF antenna feed goes through the slit too. There are two drain fittings to which we can attach hoses down to jerry cans.
 |
| Top View |
It's surprising how much more shade we seem to get without sun coming through the gap between the solar panels.
 |
| Bottom View |
After a month without rain we're now looking forward to rain forecast later this week!
Other Work
- Rotated our two propane cylinders so they lie outboard
- Polished the goalpost s/s prior to fitting the raincatcher
- Replaced two vane gear blocks and removed two other redundant vane gear blocks
- Removed outboard bracket (since our next outboard will be electric and stowed below)
- Built and fitted a new PVC board to mount the gas regulator
Twas a busy but fun weekend! Looking forward to testing all the above soon.


No comments:
Post a Comment